Want to know how to improve photos? I have four easy Photoshop tricks that I always use that will help improve any photo! And I’m going to let you in on a secret: every photographer edits their photographs. You have to have a good photograph to start with, don’t get me wrong, but a lot of the magic happens in post-production. For a photoshoot that takes up to an hour, it can take me between five and ten hours to go through and edit photos, depending on how many final photos are needed (yeah, being a photographer isn’t easy). Some photographers use Photoshop to completely transform their images into something else, like one of my favorites, Robert Cornelius. He is a Photoshop expert and can do some pretty incredible things; you can check out his work here, and prepare to have your mind blown!
For my own photographs, I usually just do some basic editing, and I have four easy photoshop tricks that I always use! I’ve heard that Lightroom is easier to learn if you don’t have an extensive background in photography, but I learned Photoshop in college and it isn’t as intimidating as you might think. There are some more high-tech tools for more advanced Photoshop users that I use with my job as a freelance photo editor to do things like removing people or rearranging things in a photo (I’ll do a post on those tools soon!). But for now I’ll run through my editing process for photos that just need a little tweaking with one of my photos from my recent spring in Philadelphia post.
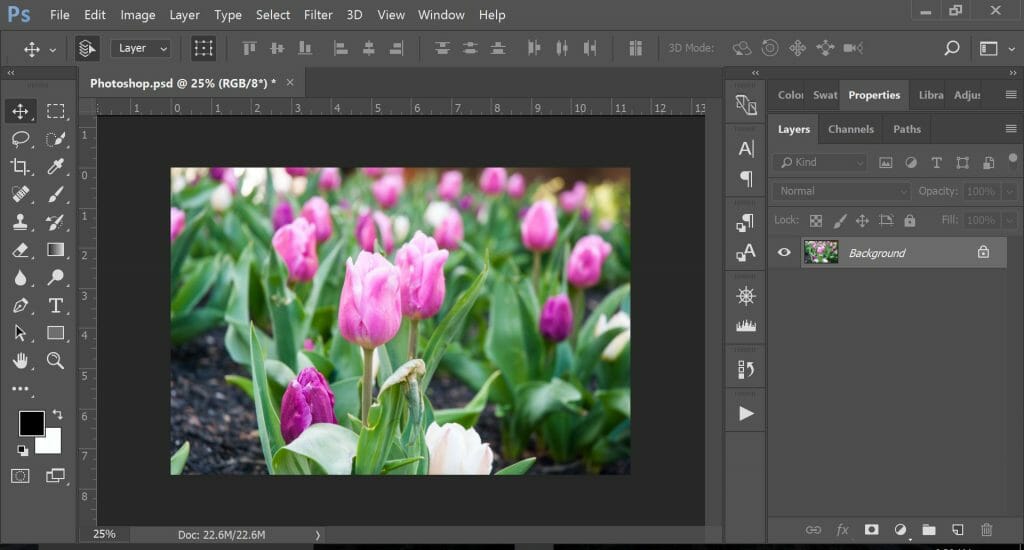
First, you open the photo in Photoshop. This one already had some tweaks to the RAW file, but if you don’t shoot in RAW, you can just open the JPEG.
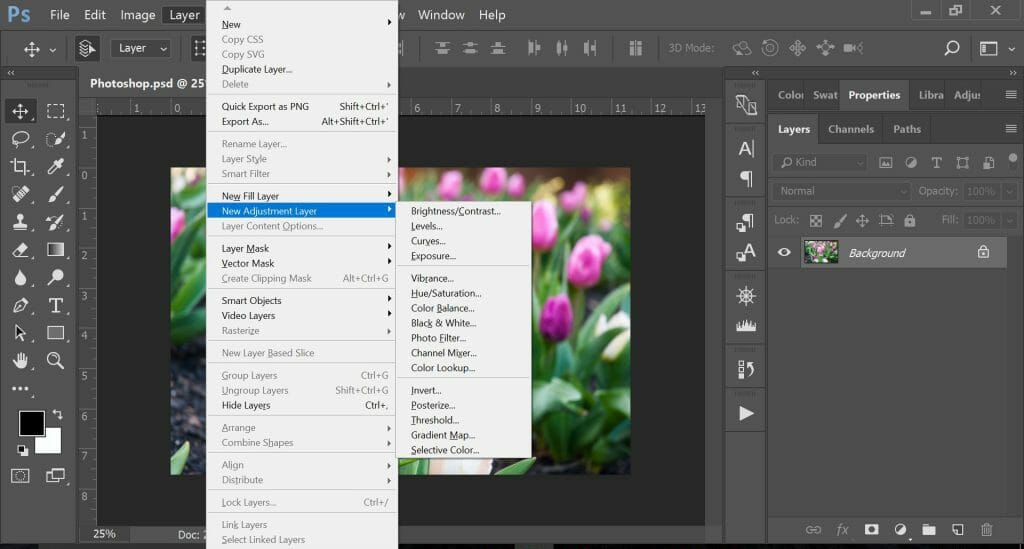
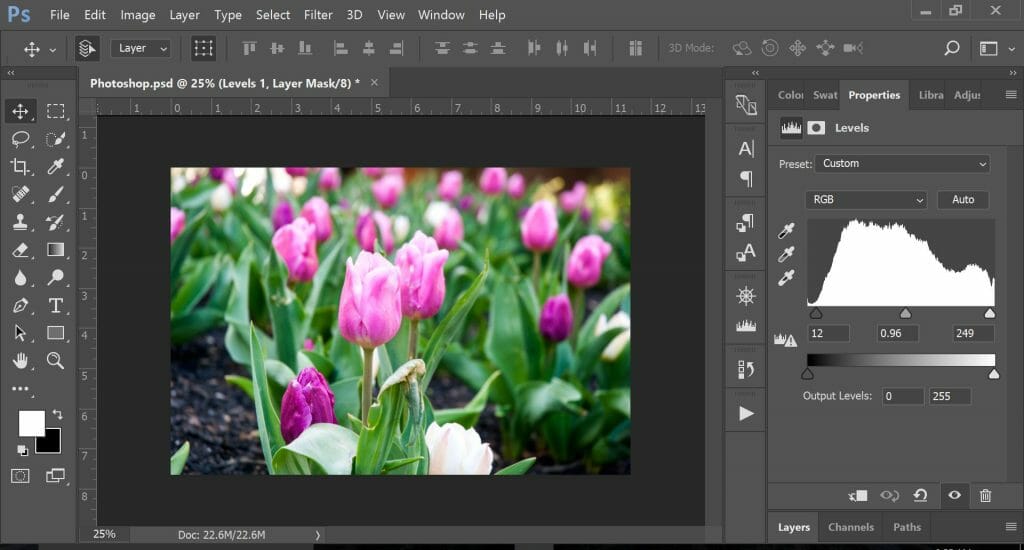
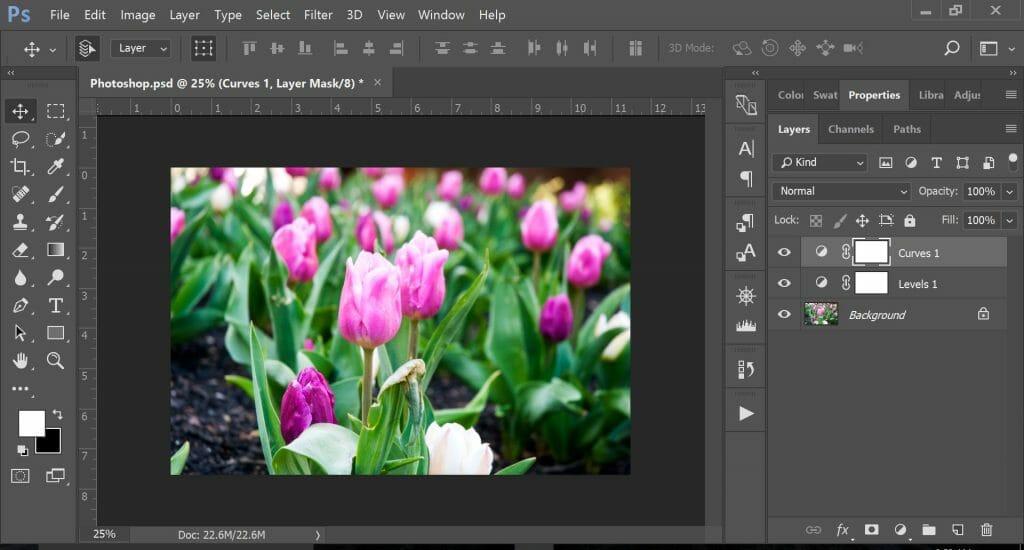
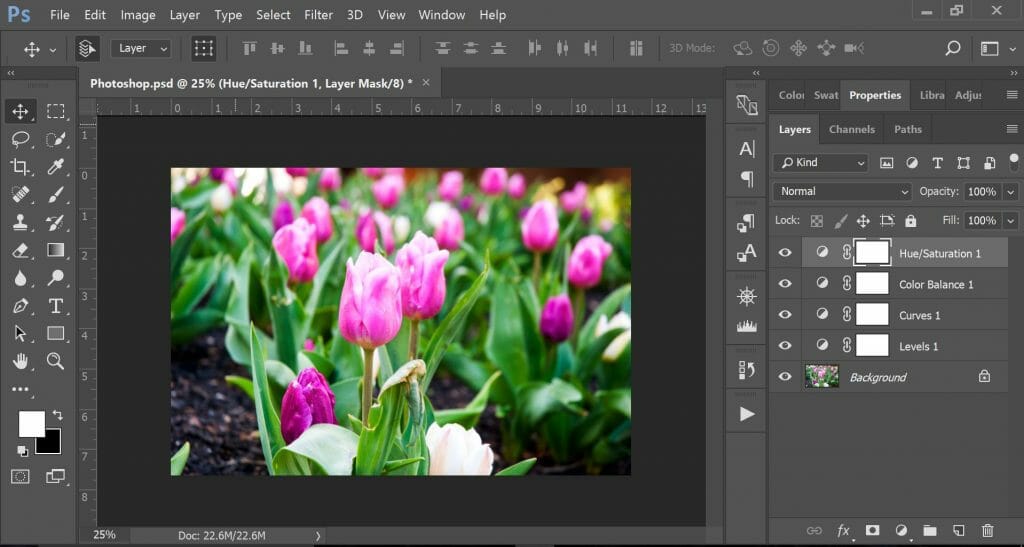
My favorite way to adjust a photo is by adding layers. You go to the top toolbar, find “Layer,” and scroll down to find “New Adjustment Layer.” The first layer I add is to adjust the contrast, but instead of choosing the “Brightness/Contrast” layer, I use “Levels” because it gives you more control over the histogram.
Once you have “Levels” open on the Properties tab, you adjust it using the the sliders. The left one controls the black point, the right one controls the white point, and the middle one controls the overall brightness of the image. In the example, I bumped up the black and white points and darkened the image a little. “Levels” is easy to use and it can really make your photos pop!
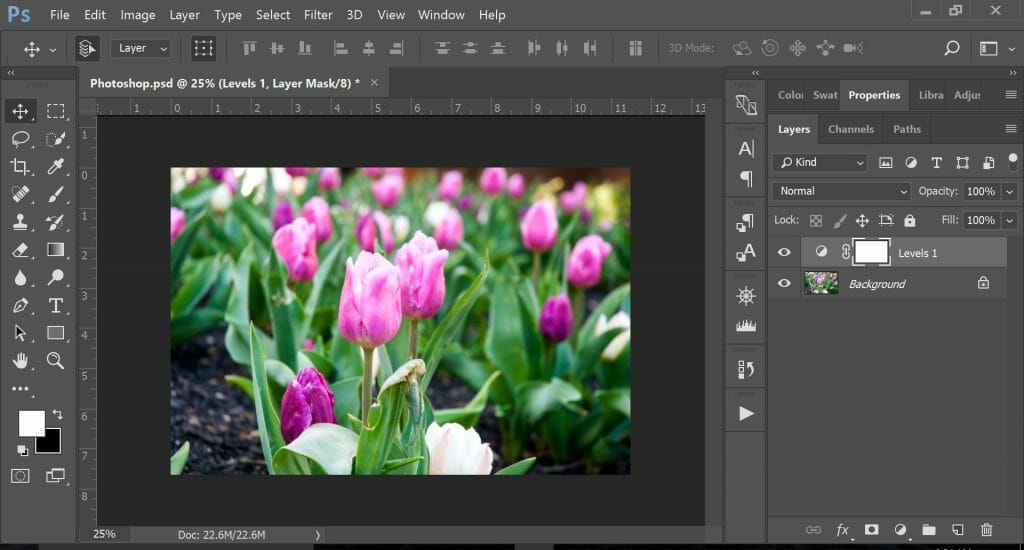
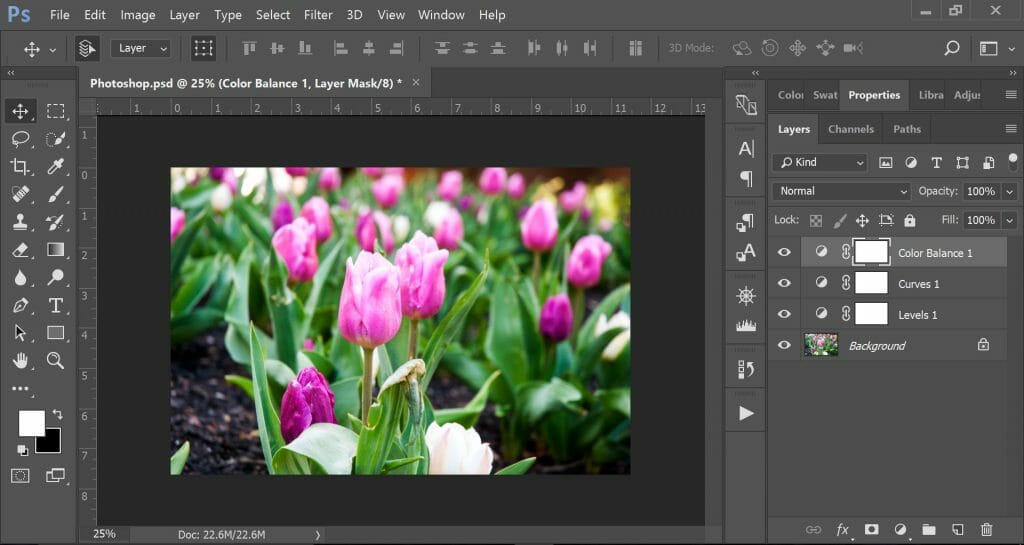
If you click on the “Layers” tab you can view all your layers. My laptop at home has a small screen so I have to switch back and forth between Layers and Properties, but my computer at work has a bigger screen can have both up at the same time, so it might look slightly different on your computer.
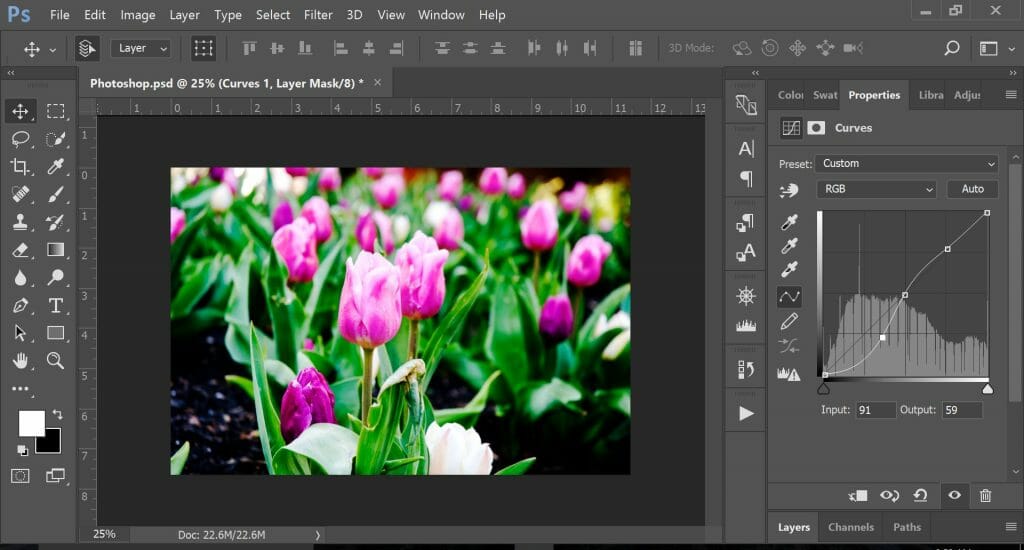
Another layer I like to use for contrast is “Curves.” You use it by adding points on the line and then adjusting it whichever way you like. You can make the contrast more extreme, like I have pictured below.
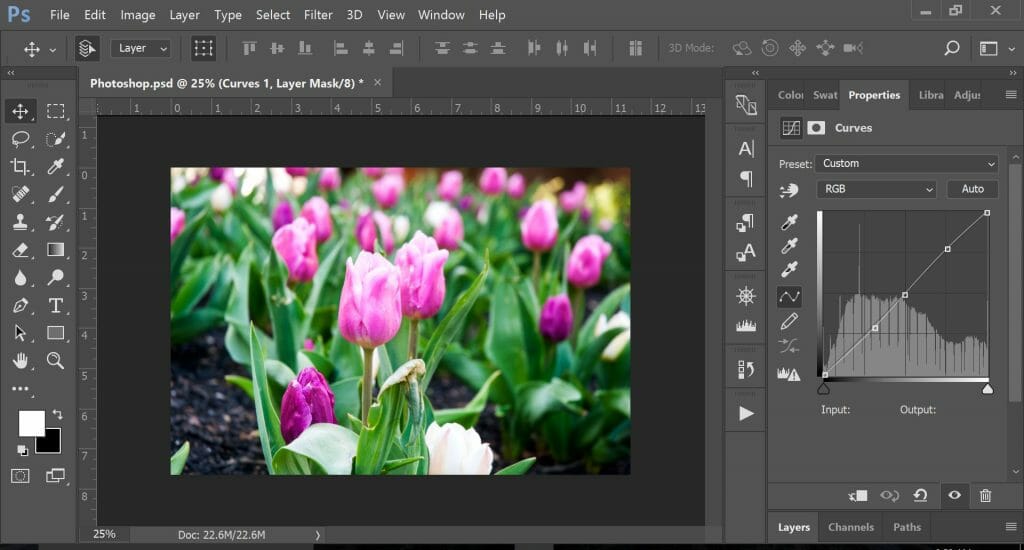
Or you can make it more subtle, like this example below (it doesn’t look like I’ve adjusted anything on it, but even slightly moving the points makes a difference). You can also use it to reduce the contrast if that’s more your style! It’s a pretty fun tool to play around with, and it’s nice having so much control.
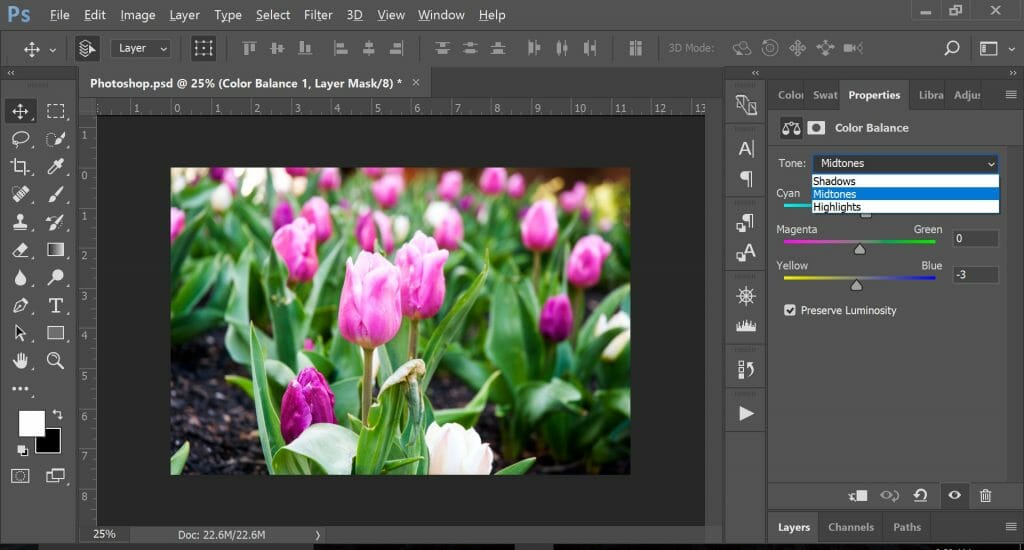
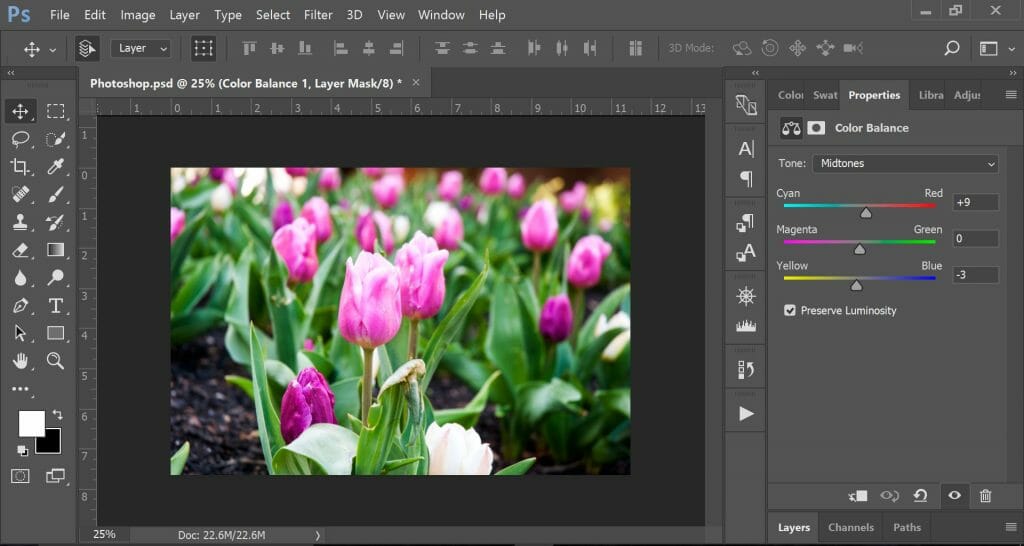
The next layer I add is “Color Balance,” which might be my favorite tool. Lighting can change how different colors look (remember the blue/black or white/gold dress fiasco?), so I try to make the colors match what they look like in person. You can also use this to create your own photography style- you can add more blue tones for a cooler look or more reds and yellows for a warmer feel. And the best part about Color Balance is that you can edit the colors for the shadows, midtones, and highlights to change exactly what you want.
For this photo, I wanted to warm it up so I adjusted the reds and yellows.
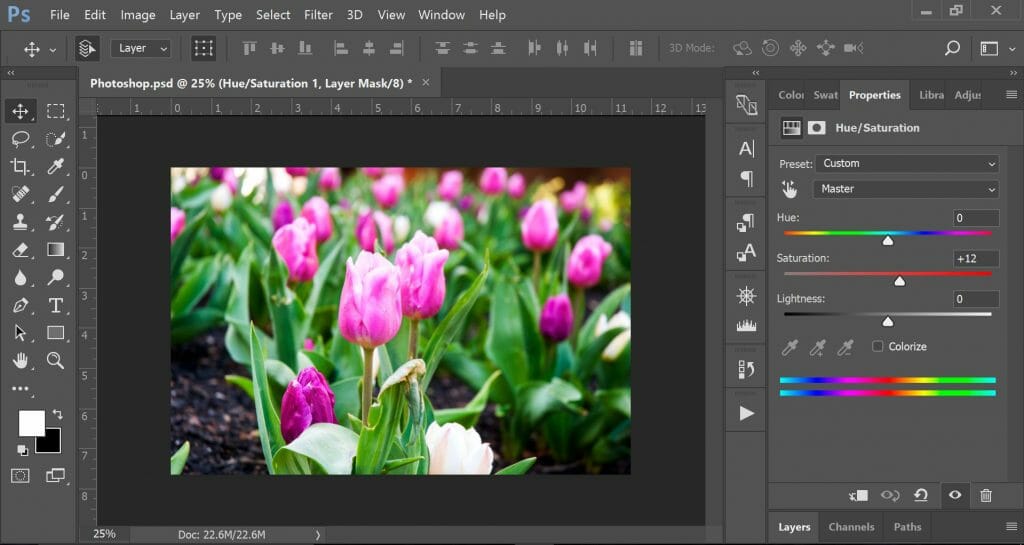
The last layer I’ll go over is “Hue/Saturation.” It’s pretty straight forward and allows you the increase or decrease the saturation of your photos. I like having bright, colorful photos, so I usually bump up the saturation a bit. You can also use the Hue slider to adjust the overall hue of your photo, but I prefer using Color Balance.
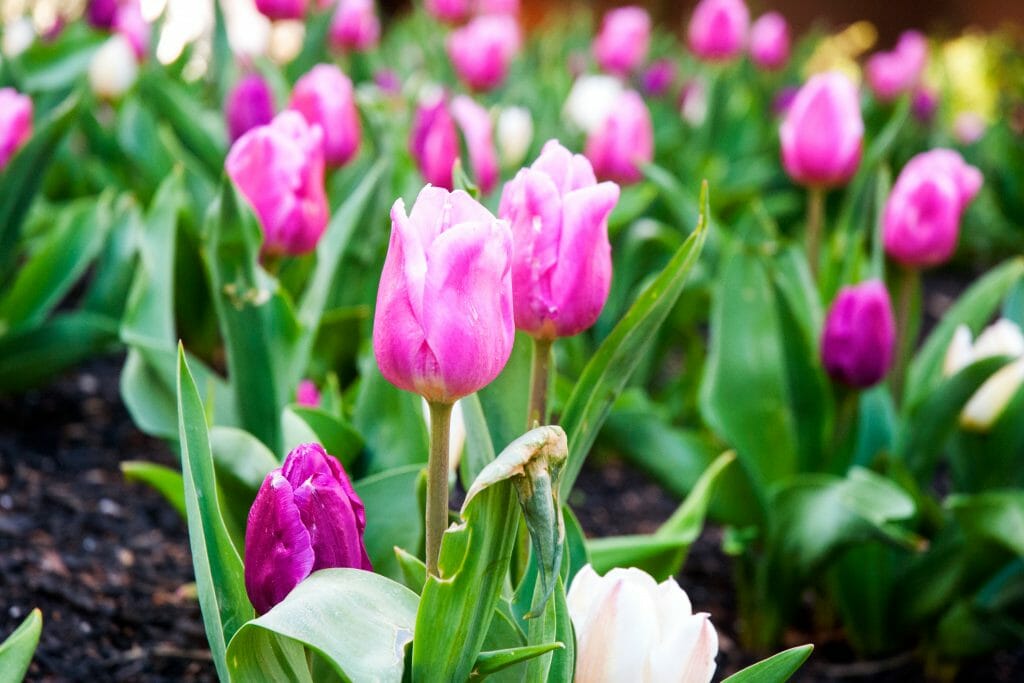
After bumping up the saturation, my photo is finished! If you’re going to be posting photos online, I would suggest exporting and “Save for Web” as a JPEG (it’s found on the “File” drop down menu).
After you’ve saved it, you have a finished product! 🙂
Some photos take a little more editing work, and I’ll go over some of my other favorite tools like Quick Selection and Healing Brush in another post. Photoshop isn’t as intimidating as you might think, and it can really help improve photos! I do work with people on teaching them how to use Photoshop and I also work as a photo editor, so if you want some help, feel free to contact me!
Before and after:
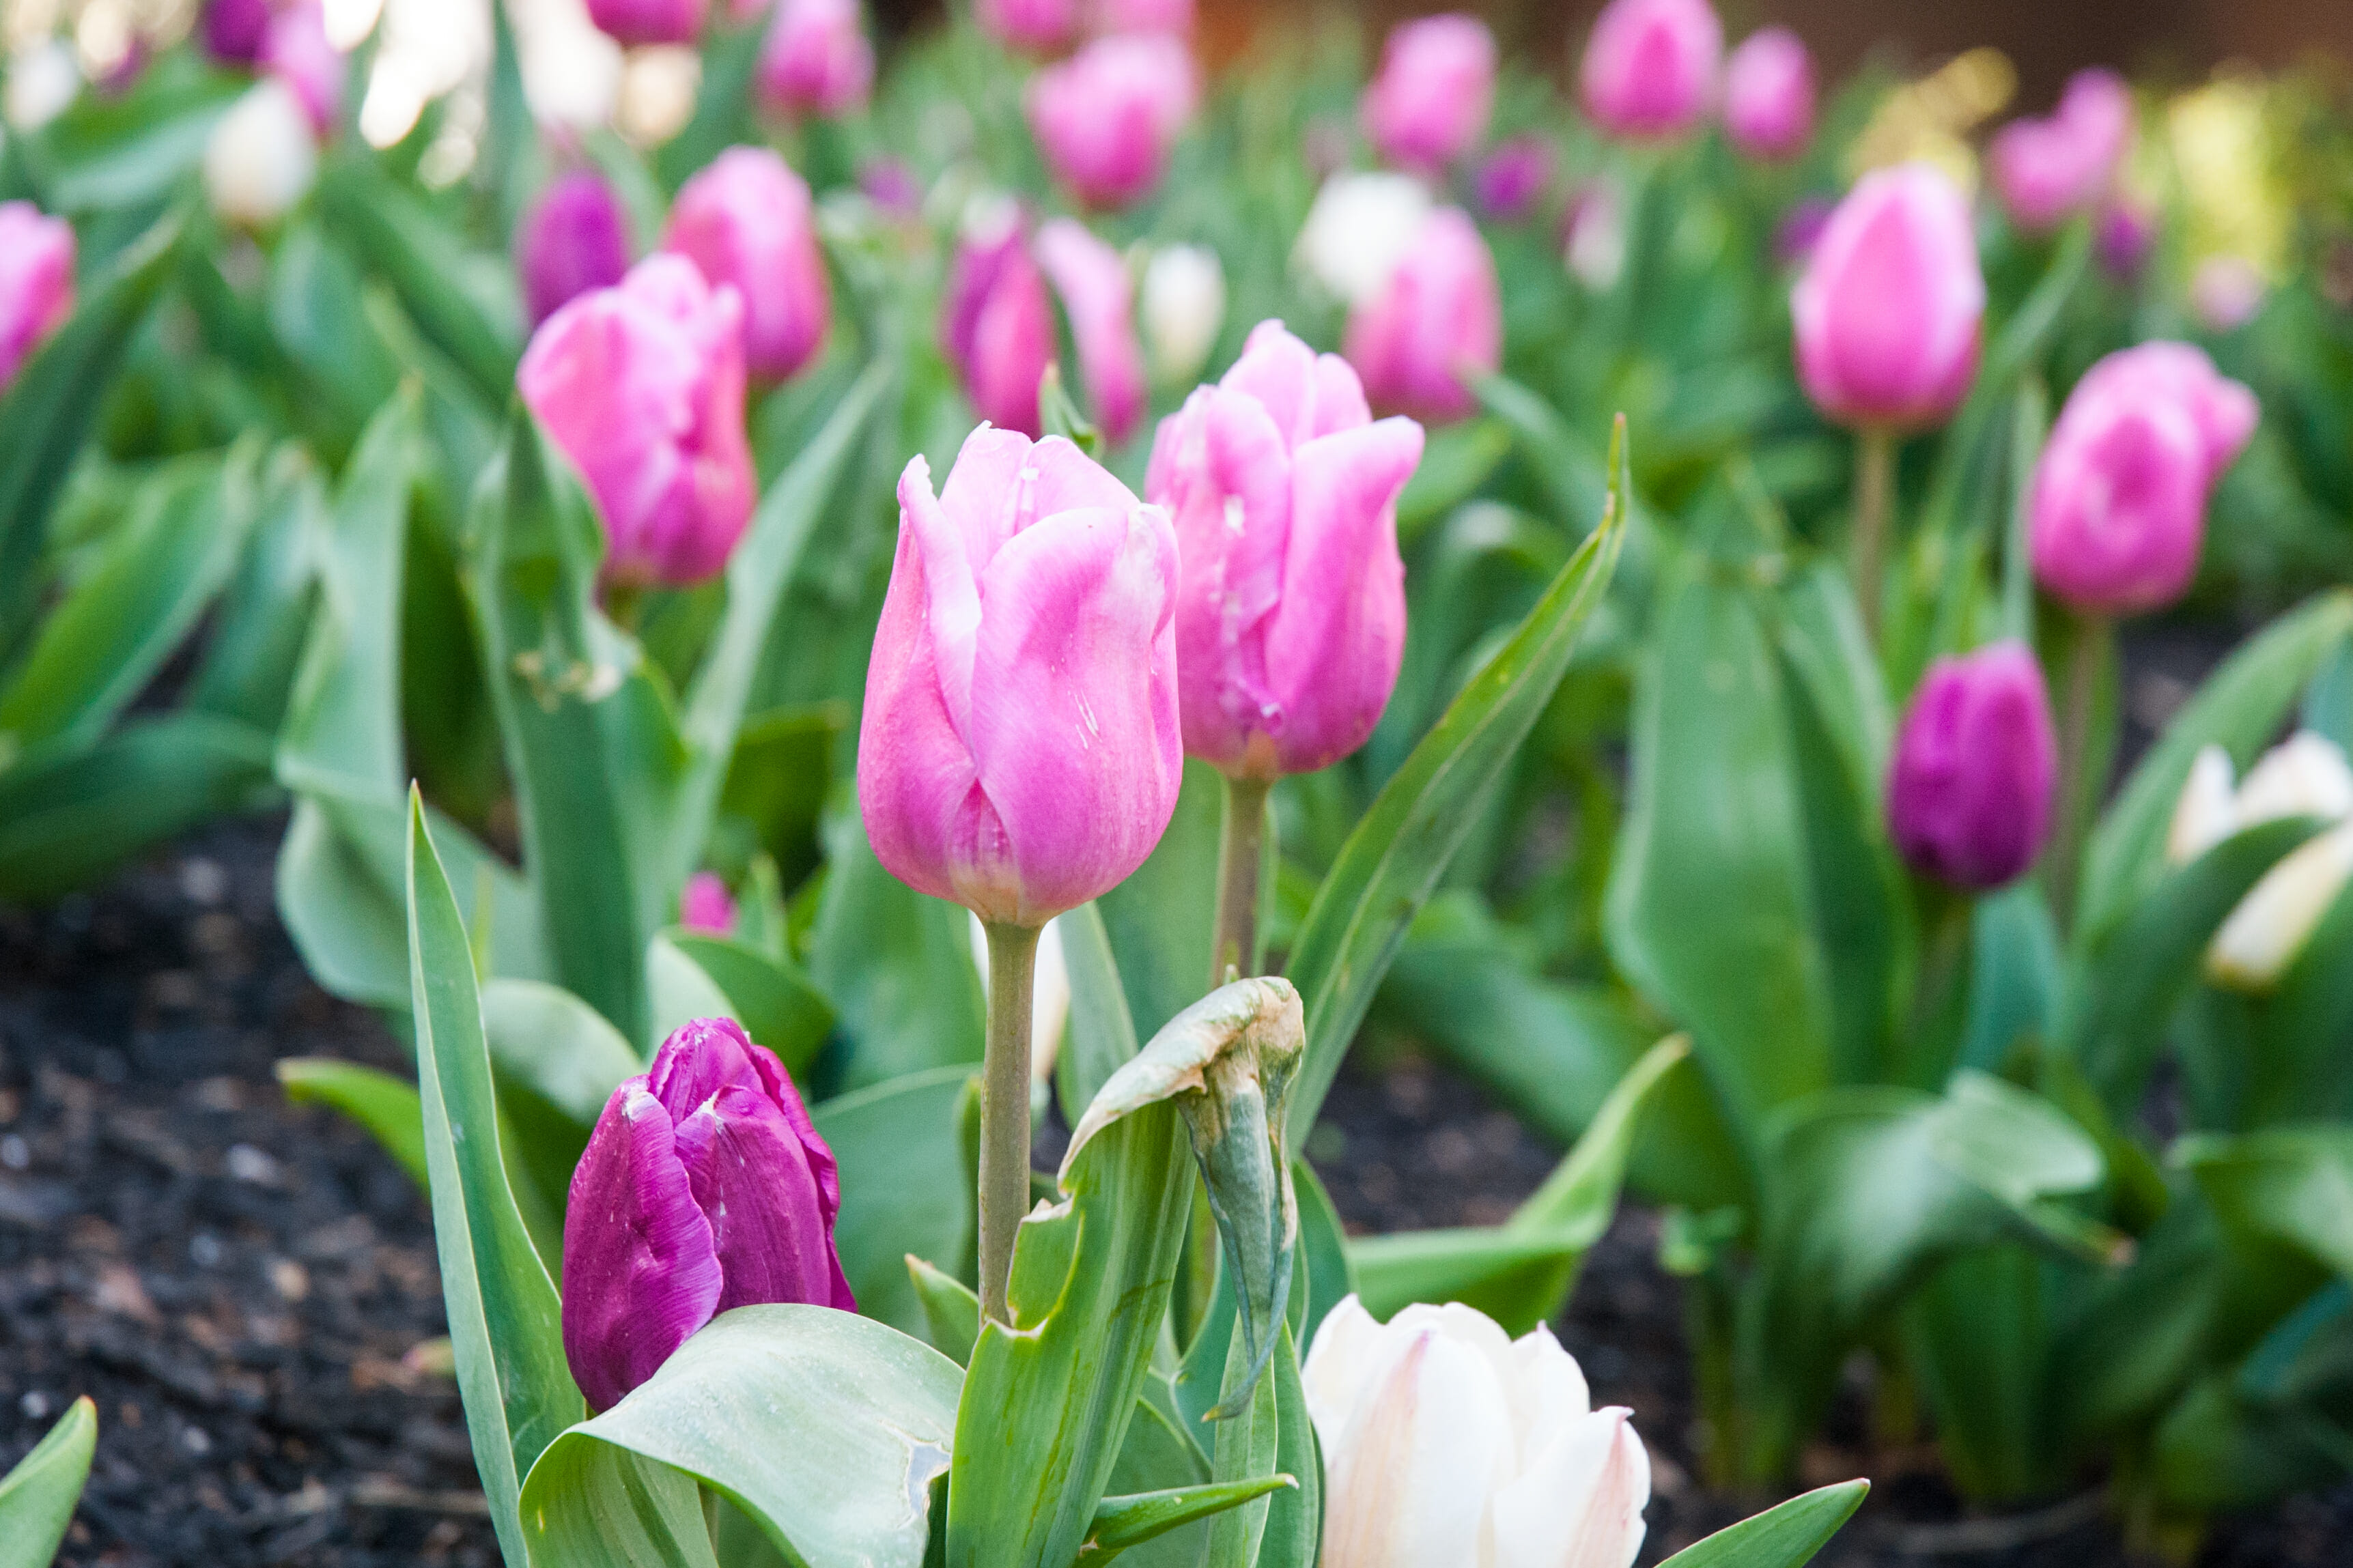
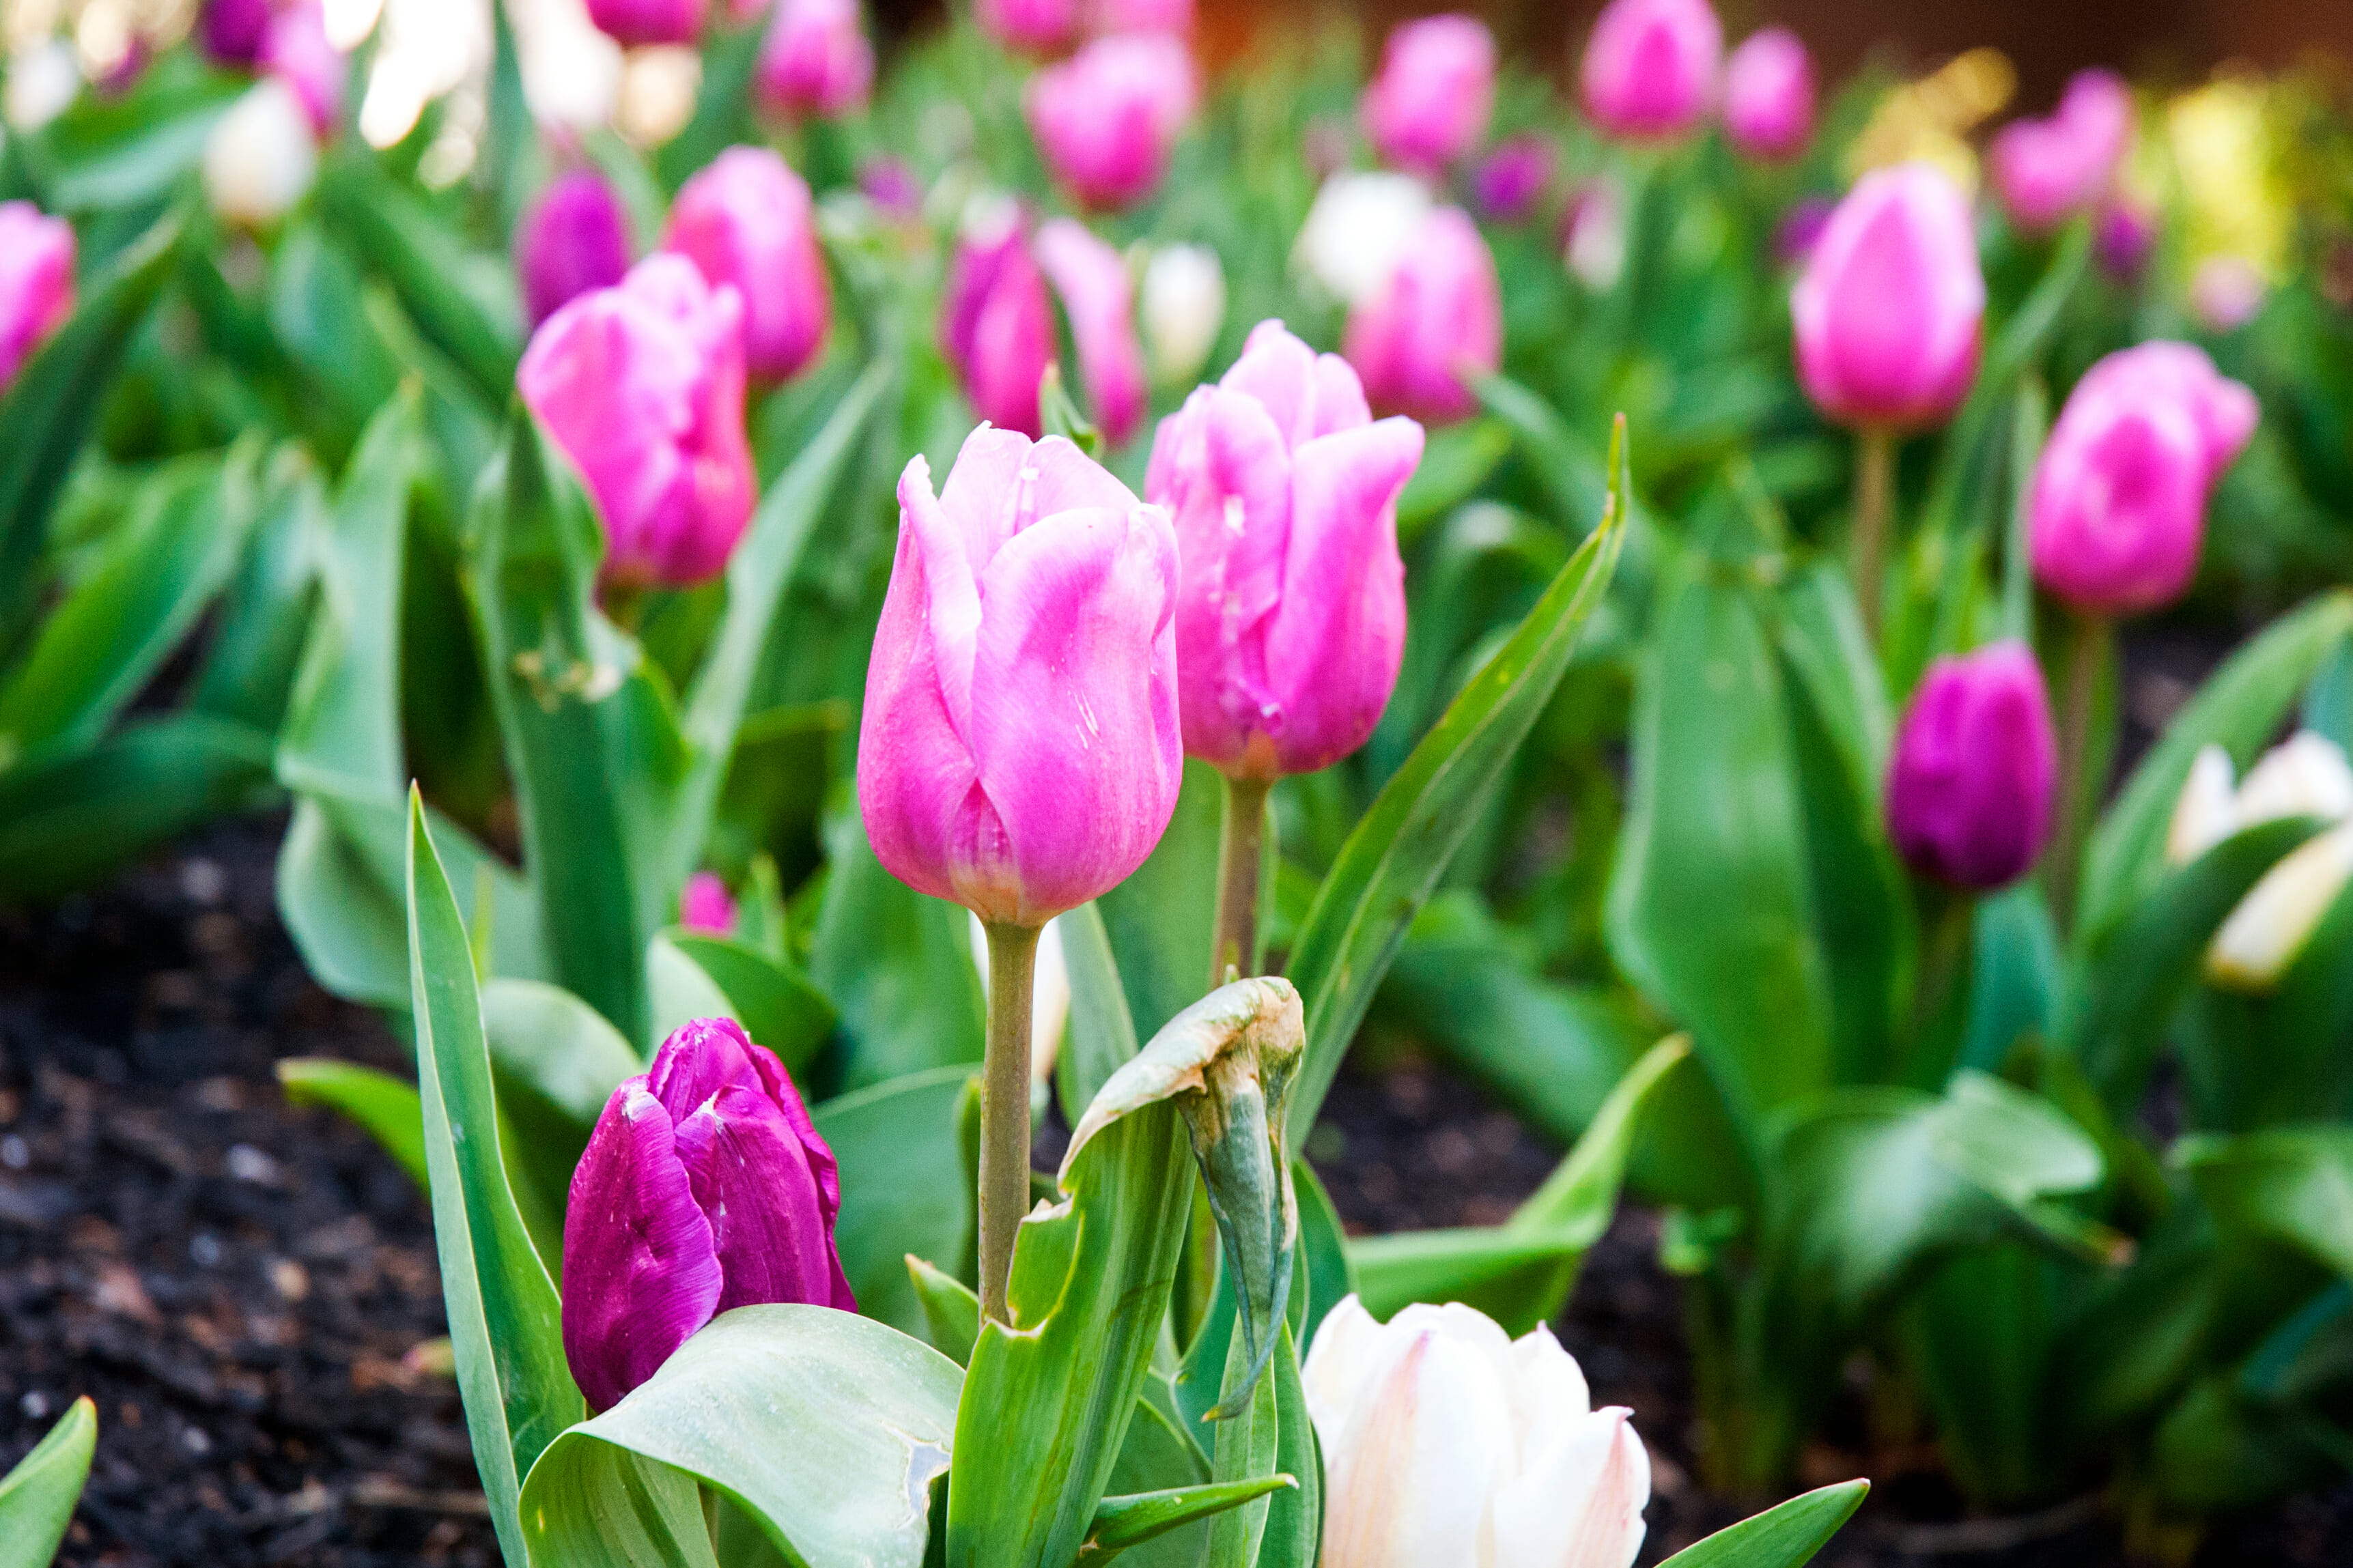
If you use Photoshop, what kind of tools do you use? Comment below! 🙂
Great tips! Even small adjustments in Photoshop — like brightness/contrast tweaks or using the healing brush — can make a huge difference in the final photo. I especially liked the reminder about sharpening subtly; it’s often overlooked but really important.
These tricks are perfect for beginners and pros alike who want to enhance their images without over-editing. Thanks for sharing such a clean and practical guide!
Thank you!
This is great! Thank you so much. I always struggle with editing and this helped so much!
I’m glad it helped!!
Wow Julia, this is an awesome tutorial, shall try it, thanks for sharing x
Thanks! I hope it helps!
I’ve never tried to edit in Photoshop because I always used less complicated photo editors, but I think I will give it a try after reading your post.
Yes it isn’t as complicated as it seems!
What wonderful tips! I’m so inspired!! xx
Thanks! I hope they help!
These are great tips, Julia! I concur with the use of levels! It adds more customization, which I love, too! Also your picture is stunning! <3
Thank you! 🙂
I’m definitely going to need to try these tips! I’ve been teaching myself photoshop as needed for projects (+ lots of youtube videos) so this is SUPER helpful, thanks for sharing!
I hope this helps! 🙂
Post production is something I haven’t even thought of as when I had an SLR, were still shooting film! I’d love to know what free tools are good as can’t imagine spending money on Photoshop right after getting the camera…or Mac specific tools as am using a MacBook:)
I know there are usually some good deals for Creative Cloud, so Photoshop isn’t as expensive as people think! I know people who use PicMonkey, and I think that’s free.
Thank you so much for sharing! I love seeing how others edit in Photoshop. I love the saturation tool to get the bolder colors.
Yes that’s one of my favorites! It can really brighten up a photo.